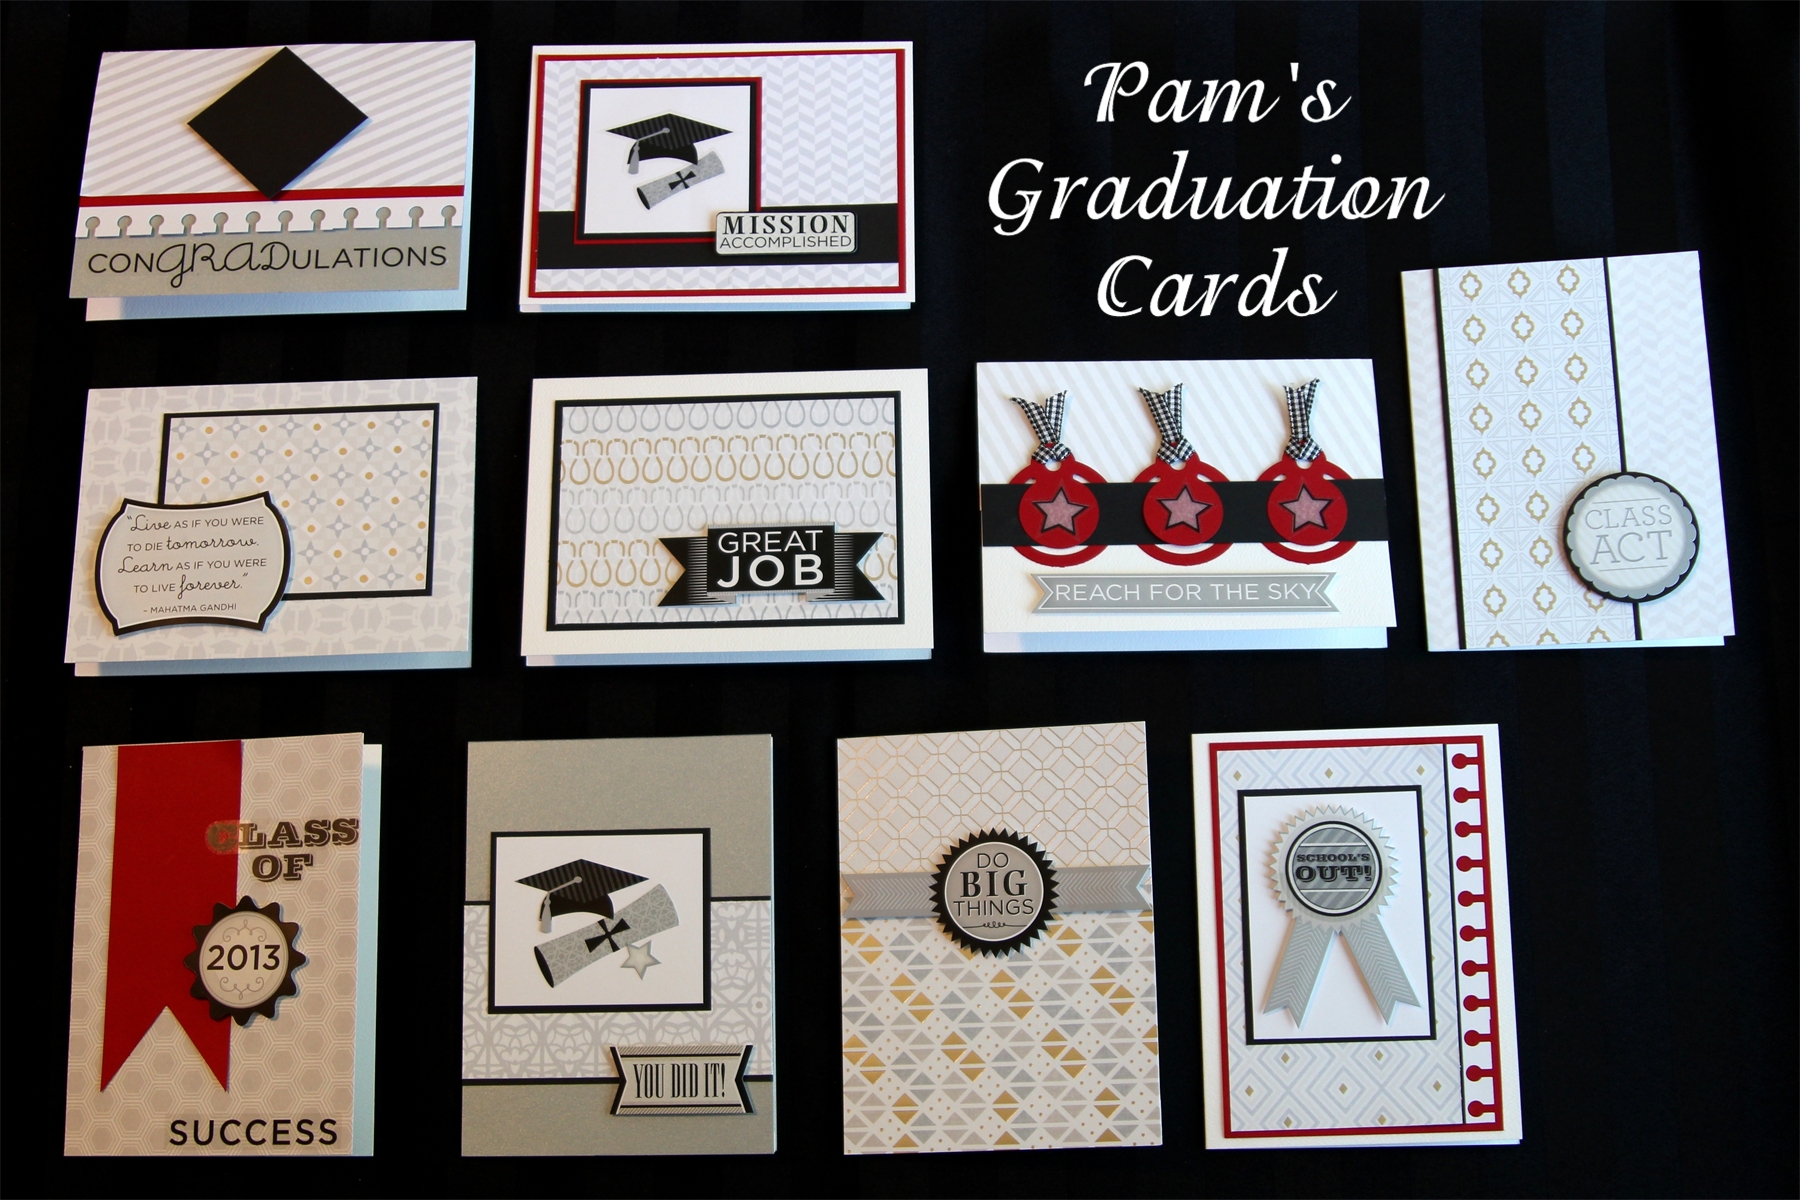
I love to make my own greeting cards to share with friends and family. Although not everyone appreciates the effort, I feel like it is sending a little more love than buying one off the store shelf. Here are a set of graduation cards I made recently.
These cards are made using Creative Memories current line of graduation products. We offer a set of stickers and a package of paper. The paper is stunning and most of it can be used for many occasions other than graduation. Weddings, retirements, anniversaries are just a few of the other uses for this beautiful paper. A number f CM tools were used including the newest “notebook” cartridge for the BorderMaker and the “circle tag” for the ShapeMaker. One trick I employed to add a little texture to the cards was to pop up many of the title blocks. Since these were actually stickers, I needed to de-sticky them first which I did by dipping them in cornstarch (baby powder works too).
Hope these inspire you to offer your congratulations to the graduates in your life!
In the last few years, our family has been closely involved with a number of weddings. I have thrown a several showers, but my very favorite one was for one of my nephew’s fiancees. Entertaining is one of my favorite creative endeavors.
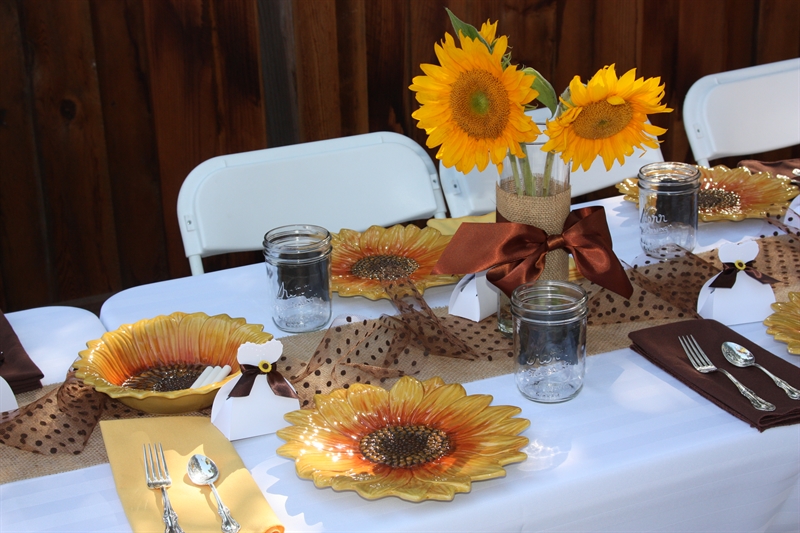
She is a country girl at heart and I tried to think of a theme to suit her tastes. Taking into consideration that the bridesmaids dresses were chocolate brown, I decided to go with a sunflower theme. I knew that I wanted to feature sunflowers and burlap. I was very pleased with the results and so was the bride!
I set the tables with white tablecloths and alternated between brown and gold napkins. Down the center of the table, I ran a strip of burlap and topped this with some brown polka dot tulle to soften the look. I was lucky to have a friend that offered me her sunflower plates as I was planning this event. We used mason jars for the beverages which I was able to borrow from another friend who had already invested in the Martha Stewart chalkboard labels. I set out pieces of chalk for our guests to write their name on their glass.
The “Happily Ever After” banner was my first foray into painting on burlap. I cut the triangles of burlap, folded over the top and sewed a quick line to give me some way to string up the banner. I then made “stencils” for my lettering out of vinyl on the Cricut. The font used was from the Creative Memories ‘Tis the Season cartridge. I took chocolate colored brown acrylic paint and filled in the stencils. To add a little more zing the the banner, I sprinkled brown glitter on the paint immediately after I painted the lettering. Then I removed the vinyl stencil. I let them dry and strung twine through the tops of the triangles. I completed the banner by adding a big satin bow to each end.
I kept the flowers simple. I took glass cylinders and wrapped them with a strip of burlap. To make sure the burlap stayed in place, I carefully ran a little hot glue to attach the burlap to the glass. I added the thick ribbon tied with a floppy bow. The burlap, tulle and ribbon all came from one of my very favorite web stores – Papermart.
I got out my trusty Cricut to make the boxes for the favors. The bride dress boxes were cut out of heavy white cardstock. The waist of the dress was tied with a brown ribbon and then a sunflower button was added as embellishment. The boxes were filled with chocolate covered coffee beans. I was afraid that they may melt and ruin the boxes, so I put the coffee beans into a clear plastic bag before putting them in the box.
It was a beautiful day and I hope it inspires you to shower someone else with love 🙂
If I had to pick just one tool to craft with, it would likely be my Cricut!
A little about me and my “Bug” since the story of my 1st Cricut is actually kind of a funny one. One of my friends had mentioned that she did not think she would be using her Cricut much as she transitioned to digital scrapbooking. She had also mentioned that she was interested in taking up golf. WAY back in the day when I was single and working a corporate job in San Francisco, my parents bought me golf clubs thinking that would be beneficial to my career. After injuring my back, doing a 180 degree change in my career goals and meeting my husband who was not a golfer, I realized that golf was not in my future. I proposed to my friend that we trade my golf clubs for her Cricut. This sounds kind of crazy now when Cricuts are pretty reasonable, but back when they first came out, they were pretty pricey. We made the trade and I have been chirping along ever since. Although I still have this original “Baby Bug”, I have had several since that time and am currently doing most of my work with an Expression 2 machine.
These machines can take your scrapbooking to amazing new heights. In addition, I have found so many uses for this machine outside of scrapbooking. I have used my Cricut to make signs for my business, banners for my school, countless projects for my Girl Scout troop, greeting cards, posters and projects for my children’s school assignments and much more.
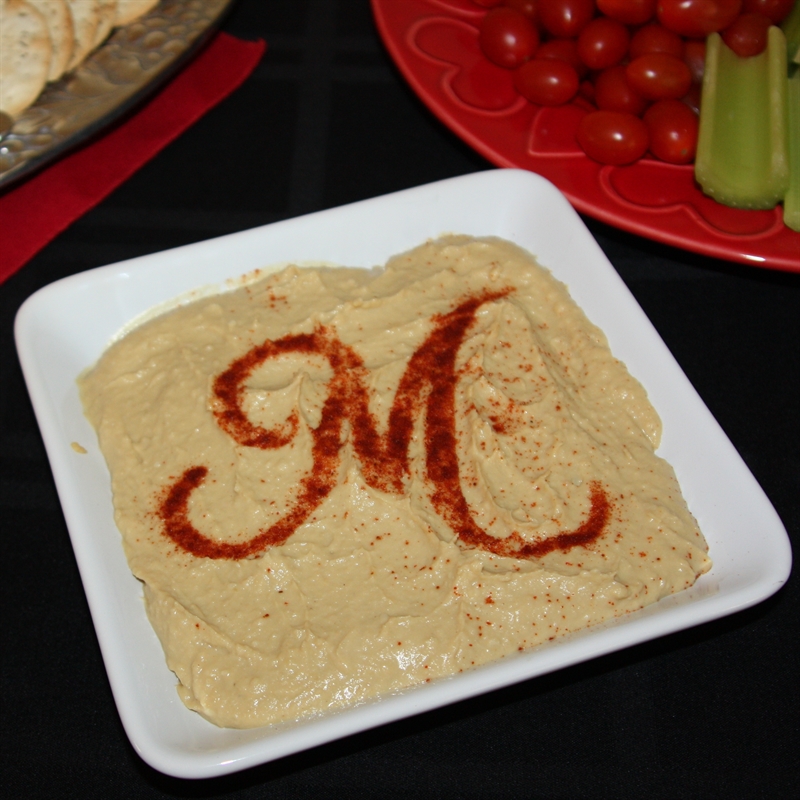
Perhaps the most interesting use of my Cricut came as I was getting ready for a bridal shower I was throwing for my nephew’s fiancee. I remembered back to one of my own bridal showers that was done by my husband’s co-workers. One of the cool, local ethnic food places near my husband’s office in Berkeley, CA had taken a plate of hummus and decorated the top of it with a multitude of different spices in a patchwork quilt design. That gave me the idea to decorate my own hummus…or in this case monogram it!
To do this, I started by spreading my hummus and giving it a fairly flat surface. I then took some heavy paper and cut out a large M (using the Creative Memories Divine Wedding cartridge). Instead of using the shape that the Cricut cut out, I used the outside (the negative of the shape) as a stencil. I placed this gently over my hummus and sprinkled some paprika over the opening. I carefully lifted up the paper and was left with the above result. Pretty fun for a last minute idea 10 minutes before I ran out the door to the shower!
*****Still learning this blogging thing. Thought I had a bunch of posts ready to go while I was out of town and they did not show up here. Here’s to a little catching up. Enjoy!*****
I’ve always said that I have one of the more unique reasons for starting to scrapbook.
I started creating my own albums when I was in high school because of an “epiphany” I had several years earlier. I remember sitting straight up in bed one Saturday morning when I was about 10 years old. I had decided what I was going to do with the rest of my life. This was a big deal for me. Before that time, I had varying interests which put me in a different career path every day of the week – a firefighter one day, a teacher the next, a florist, a ballerina, etc. I had finally decided that I was going to become the President of the United States. I had two very specific reasons for this decision. The first was that I wanted a job in which I could help a lot of people. When you are 10, you figure that the President makes laws and these laws make everyone happy. The second reason is that I was a huge Princess Diana fan. I figured if the Reagans could go to her wedding, if I was the President, I could be her friend and I felt like she needed a friend.
As a fan, I collected books about the Princess. A few years into this dream, it hit me – someday people would be writing books about me. I started scrapbooking because I wanted these books to be interesting. Ironically, my early scrapbooks do not include journaling and therefore lack a good bit of “the real story”. I truly believed for about eight years (until soon after I left for college and realized I was far too honest for politics) that I would someday be the President of the United States. While my dream of even meeting Princess Diana was sadly dashed in 1998, my desire to have a job that helps a lot of people has been realized. 15 years ago today, I signed up as a Creative Memories Consultant. Through Creative Memories, I am doing a job that can have a positive effect on people’s lives every day by helping them tell their story and the story of those most precious to them.
I am a 5th generation native Californian. I am not at all Hawaiian, but have been lucky enough to spend more time in the state of Hawaii than any other state outside my home. One of our favorite activities to do while we are there is eat. There are so many wonderful flavors to be found (and eaten) in the islands.
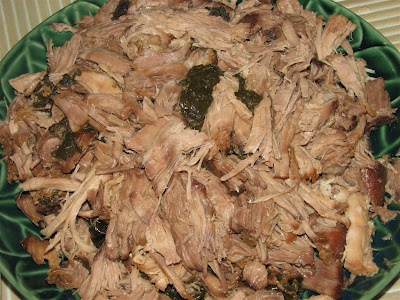
At some point, my husband and I decided to have our own lu’au party to share our Hawaiian love with friends. First thing I had to figure out how to cook was the centerpiece of any lu’au feast – the Kalua Pork. I knew right away that it would not be “authentic” as I had no plans to get crazy and cook an entire pig in the ground.
Preheat oven to 325 degrees. Rub salt and smoke over meat. Place meat on foil. Wrap in foil and place in roasting pan. I usually add a little water to the pan for extra moisture. Let it cook 4-5 hrs until meat falls apart. I shred it using 2 forks.
It cooks very nicely in the oven. Because I am often cooking in larger quantities, I throw it in my roaster oven (kind of like a slow cooker on steroids) and let it go. I have also given up on measuring amounts of each ingredient. A more authentic recipe would wrap the pig in banana or ti leaves. When I started out, I did wrap a few pounds of spinach around the meat. I thought I needed to do that for moisture, but it seems fine without it (as long as you tightly wrap in foil).
Since the first time I made this, I have tweaked the recipe a bit and cooked literally hundreds of pounds of pork. We love to entertain and think nothing of inviting 50 friends and family for a meal. Kalua Pork is great to serve at parties because it serves a lot and no one is standing over a hot grill all day, battling yellow jackets and flies and missing the party. It is usually a hit!
I’ve always been creative. From a young age, I have dabbled in too many creative endeavors to count. I have tried sewing, cross stitch, needlepoint, embroidery, chicken scratch, photography, scrapbooking, card making, painting, baking, cake decorating, party planning, home decorating and many more. Some, like photography, have stuck. I got my first camera when I was 8 and have owned one continuously since then. That one lead me to start scrapbooking at a young age (much more on that later). I never did quite develop much talent for embroidery and chicken scratch was just a passing fad.
I think that “being creative” does not just mean that you are good at arts & crafts. It has been said that the definition of creative is “to do something in a new or different way”. I love a chance to learn new things and stretch my creative boundaries as far as I can. A favorite compliment given to me was when my former boss (the COO at an investment bank) said that if she was stuck on a desert island she would want to have me there “because I can figure out anything”. I was recently inspired to re-focus on the idea of creativity when I visited a quilt show. One of the vendors had set up a personal challenge to quilt for 1/2 hour per day. Some were quick projects she created and others were a few minutes work on a larger project. It got me thinking that I should do this.
Although I create much more than most people, I really have let my passion and excitement for creating things wane as I dealt with the daily tasks of being a wife and mother. I’ve let people saying, “It is so nice you have time to do that” make me think that what I was doing was optional when in fact, I have to make things to feel fulfilled. Some people “have to” work out, I have to create. My family often loves the things I make, so I have recently decided to embrace that side of me again.
Here is a little something I painted last summer that perfectly sums it up…
I’ve created this blog to share those endeavors with you and hopefully inspire you to Create, Bloom & Grow!